I was asked to post a tutorial with tips on accessing anterior teeth. Please follow the manual for outline form. The purpose of this tutorial is to understand the direction you need to direct your access to locate the canal(s). This is where the most common and detrimental mistakes are made with anterior access. Generally, the shape of the access cavity for an anterior tooth will be an upside down triangle, with the apex of the triangle incisal the cingulum and the base of the triangle somewhere below the incisal edge. It is important not to extend the access below the cingulum, because the cingulum gives the tooth a lot of its strength, so we don’t want to needlessly cut it away. It is nice to not cut the incisal edge, to preserve its integrity and esthetics. As you will see below, sometimes it is necessary to cut the incisal edge in calcified cases. The purpose of making it a triangle is to clean out the pulp horns. You will notice in the case below that my access is not a triangle, this is simply because it was a very calcified tooth with no pulp horns. You guys will be treating teeth with wide open pulp chambers and pulp horns, so for the class and boards, the outline of the access cavities should look like they do in the manual.
Accessing anterior teeth is very difficult because it is difficult to appreciate the direction of the long axis of the root when we are initiating the access from the lingual side of the crown. These teeth are skinny at the neck, so there isn’t a lot of room for error.
There are two very common errors made: (both have to do with improper orientation during access).
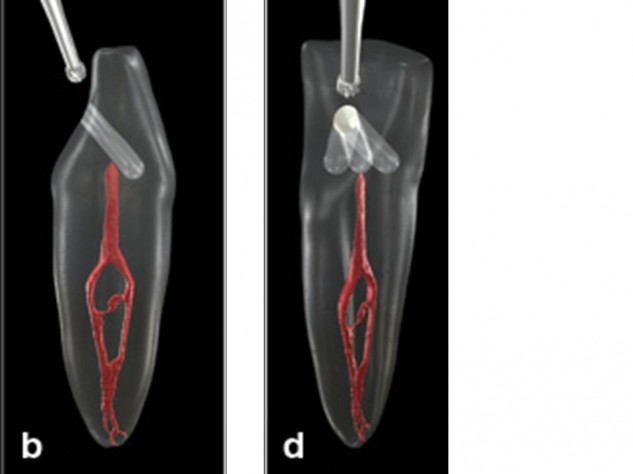
1. Perforating out of the facial side around the CEJ. (pic B)
2. Perforating or gouging mesially or distally. (pic D) Even if you don’t perforate, gouging (drilling away too much tooth structure while looking for a canal) can weaken a tooth enough that the crown can break off.
Notice from the picture above (borrowed from Dentistry Today), that the best straight line access to these teeth would be right through the incisal edge. The reason we access through the lingual side of the tooth is to avoid violating the incisal edge, not because it gives us the best straight line access. In cases where the pulp chamber has not receded, such as the cases you will be treating, you will not need such a vertical angle to find the pulp chamber, and will not need to violate the incisal edge. So, don’t extend your access past the incisal edge. The further your pulp chamber has receded, the more you will have to tip your bur vertically toward the incisal edge to be able to drill down and find it.
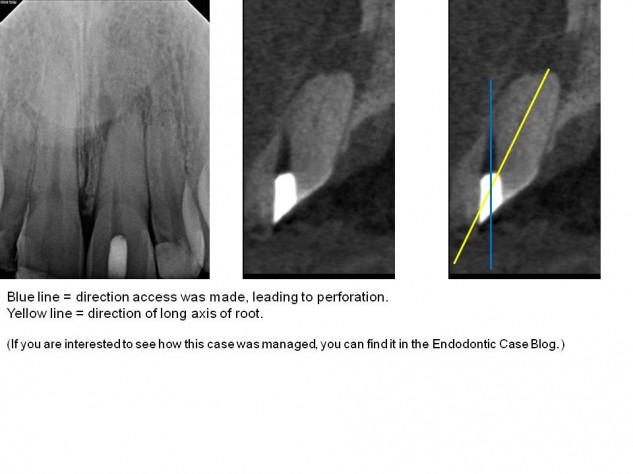
Notice how if we start on the lingual with our bur pointed toward the facial, and continue in this direction, it will lead to a perforation out of the facial side of the tooth. The sagittal CBCT image below is an example of a case where a dentist did just that. Notice how the canal is located in a completely different direction from where they were looking. This common error is due to accessing from the lingual, but not realizing you still need to be oriented down the root.
This is an extreme example to illustrate the point of long axis. This was a very calcified case. CBCT showed that I wouldn’t expect to find a patent canal until 16.5mm. Note that if access was oriented from the lingual in a buccal direction, drilling 16.5mm would not only perforate the facial side of the tooth, but possibly the patient’s lip.
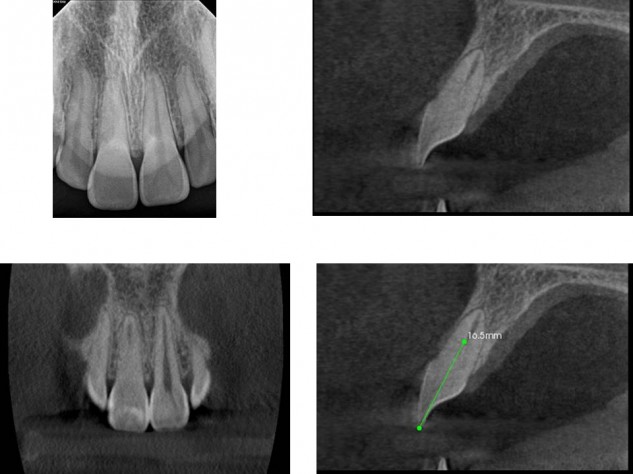
This case was so calcified that I took an interoperative CBCT to make sure I was in the long axis of the tooth in three dimensions. If you are getting nervous drilling down into the root, it is always good to stop and get images to see where you are.
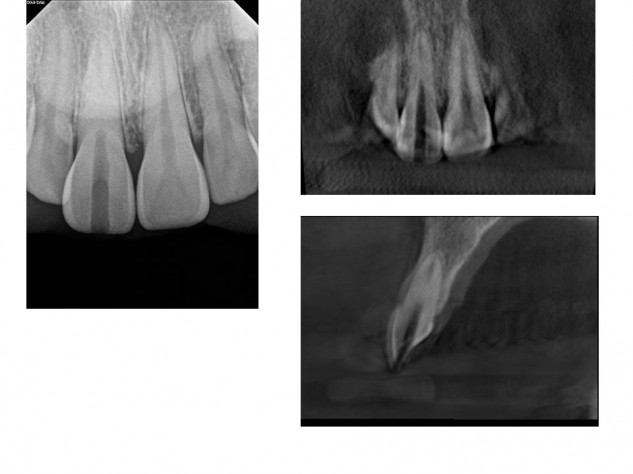
By remaining in the long axis of the root, the canal was eventually located without procedural errors and treatment was completed.
The take – home points are:
1. Use the triangular outline form shown in your manual, because you will have pulp horns.
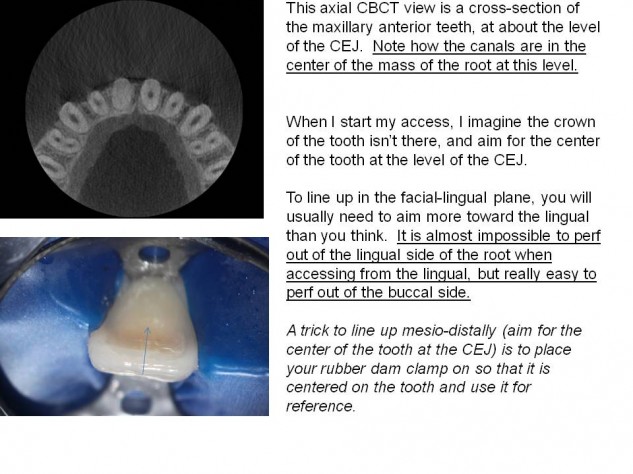
2. Understand where the long axis of your root is, in relation to the cavosurface margin of your access cavity. When accessing from the lingual, aim more lingually than you think (drill in the direction of the root, not perpendicular to the lingual surface of the tooth). Avoid weakening teeth with mesio-distal gouging.
I recommend taking photos of your teeth from the side before you mount them. I also recommend having another unmounted anterior tooth out to reference. If you are accessing and don’t find a canal at the level you think you should, stop and take a radiograph.